728x90
2년전에 SpringBoot / Swagger2 / lombok / Gradle Project 환경 설정
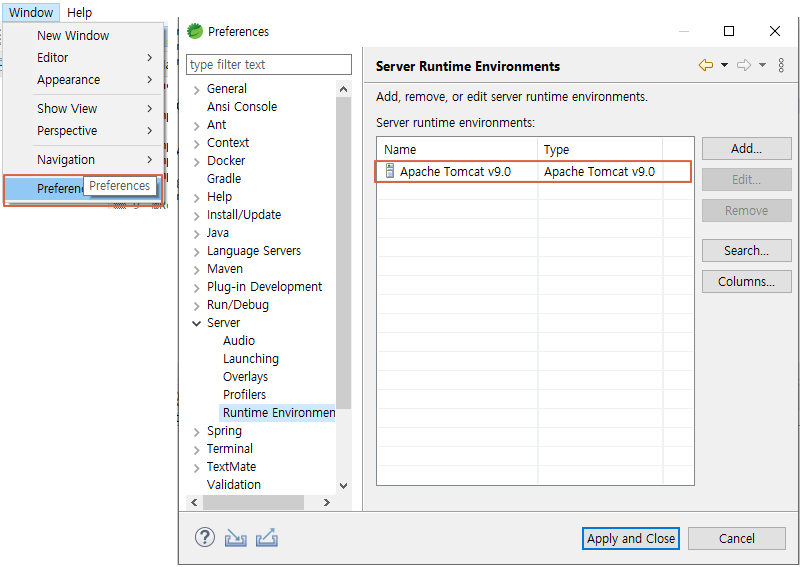
2. STS(SpringTollSuite) 환경설정
- Tomcat 다운로드 / Tomcat 서버 설정 하기
3. Gradle Project 생성


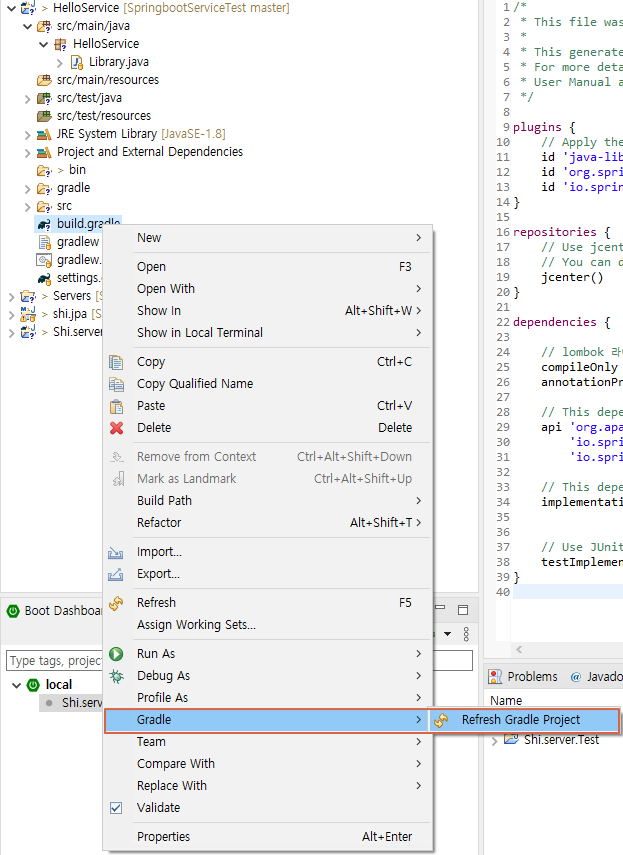
프로젝트 생성후 build.gradle 파일을 수정합니다.
/*
 * This file was generated by the Gradle 'init' task.
 *
 * This generated file contains a sample Java Library project to get you started.
 * For more details take a look at the Java Libraries chapter in the Gradle
 * User Manual available at https://docs.gradle.org/6.3/userguide/java_library_plugin.html
 */

plugins {
    // Apply the java-library plugin to add support for Java Library
    id 'java-library'
    // 추가
    id 'org.springframework.boot' version '2.1.6.RELEASE'
    id 'io.spring.dependency-management' version "1.0.8.RELEASE"
}

repositories {
    // Use jcenter for resolving dependencies.
    // You can declare any Maven/Ivy/file repository here.
    jcenter()
}

dependencies {

    // lombok 라이브러리 추가
    compileOnly 'org.projectlombok:lombok:1.18.18'
    annotationProcessor 'org.projectlombok:lombok:1.18.18'

    // This dependency is exported to consumers, that is to say found on their compile classpath.
    api 'org.apache.commons:commons-math3:3.6.1',
    	'io.springfox:springfox-swagger2:2.6.0',  // 스웨거 추가
        'io.springfox:springfox-swagger-ui:2.6.0'

    // This dependency is used internally, and not exposed to consumers on their own compile classpath.
    implementation 'com.google.guava:guava:28.2-jre',
    				'org.springframework.boot:spring-boot-starter-web'  // 추가

    // Use JUnit test framework
    testImplementation 'junit:junit:4.12'
}
수정후 Refresh Gradle Project를 수행합니다.
여기서 주의할 점은 Gradle의 JAVA 버전이 1.8 보다 높아서 11이나 15를 사용하는 경우 컴파일 오류가 있을수 있음. 본인은 1.8로 변경을 하여 작업하였음.

Application.java 를 생성합니다.
package HelloService;

import org.springframework.boot.SpringApplication;
import org.springframework.boot.autoconfigure.EnableAutoConfiguration;
import org.springframework.boot.autoconfigure.SpringBootApplication;

import springfox.documentation.swagger2.annotations.EnableSwagger2;

@SpringBootApplication
@EnableAutoConfiguration
@EnableSwagger2
public class Application {

    public static void main(String[] args) {
        SpringApplication.run(Application.class, args);
    }
}
SwaggerConfig.java 생성
package HelloService;

import org.springframework.context.annotation.Bean;
import org.springframework.context.annotation.Configuration;

import springfox.documentation.builders.PathSelectors;
import springfox.documentation.builders.RequestHandlerSelectors;
import springfox.documentation.spi.DocumentationType;
import springfox.documentation.spring.web.plugins.Docket;
import springfox.documentation.swagger2.annotations.EnableSwagger2;

@Configuration
@EnableSwagger2
public class SwaggerConfig {

    @Bean
    public Docket api() {
        return new Docket(DocumentationType.SWAGGER_2)
                .select()
                .apis(RequestHandlerSelectors.any()) // 현재 RequestMapping으로 할당된 모든 URL 리스트를 추출
                .paths(PathSelectors.ant("/api/**")) // 그중 /api/** 인 URL들만 필터링
                .build();
    }
}
여기까지 하고 바로 실행테스트 확인
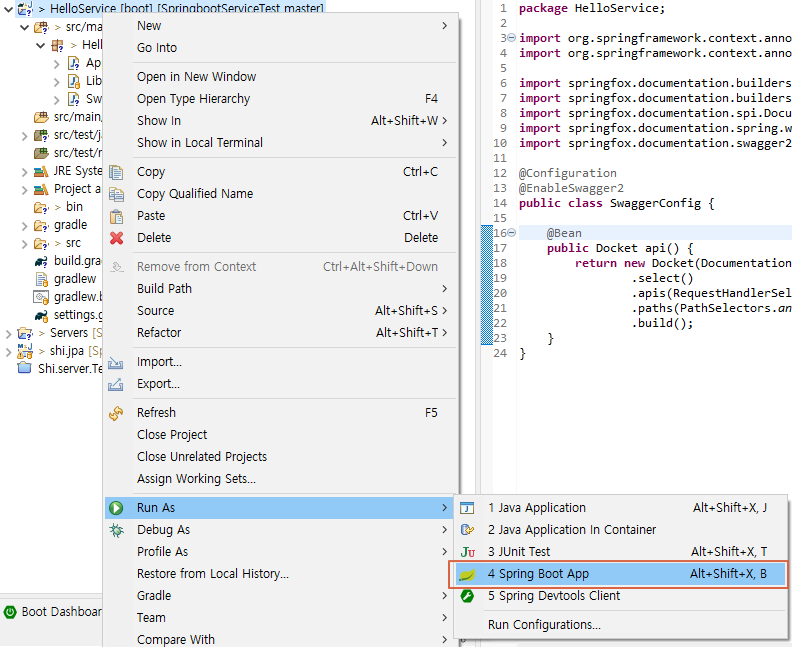

초기 실행화면 localhost:8080/swagger-ui.html

이제 hello 서비스를 만들어서 테스트 합니다.
저는 HelloService.demo1 패키지에 작성합니다. Hello.java / HelloController.java 파일을 생성
package HelloService.demo1;

import lombok.Getter;

@Getter
public class Hello {

    private final long id;
    private final String content;

    public Hello(long id, String content) {
        this.id = id;
        this.content = content;
    }
}
package HelloService.demo1;
import java.util.concurrent.atomic.AtomicLong;
import org.springframework.web.bind.annotation.RequestMapping;
import org.springframework.web.bind.annotation.RequestParam;
import org.springframework.web.bind.annotation.RestController;
@RestController
public class HelloController {
private static final String template = "Hello, %s!";
private final AtomicLong counter = new AtomicLong();
@RequestMapping("/api/hello")
public Hello greeting(@RequestParam(value="name", defaultValue="World") String name) {
return new Hello(counter.incrementAndGet(),
String.format(template, name));
}
}여기 까지 작성을 하고 hello service 다시 실행하여 테스트 합니다.

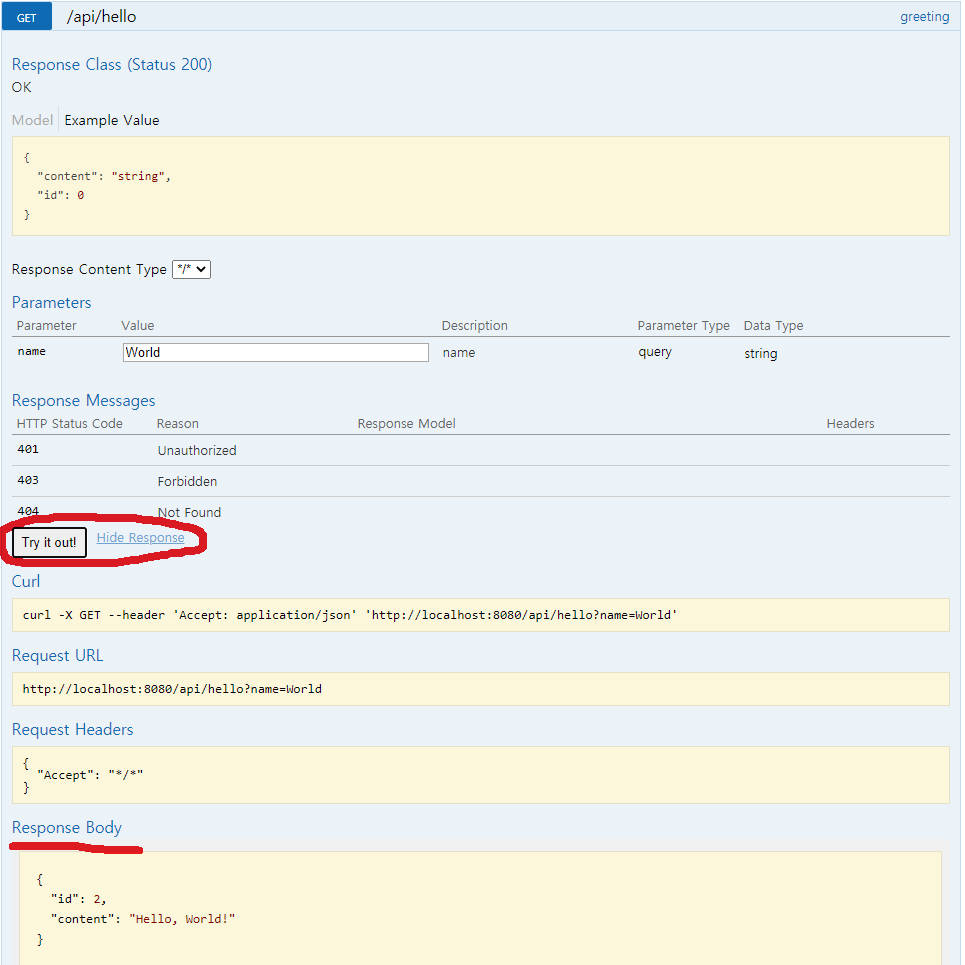
정상적으로 서비스가 실행되는 부분을 확인하였습니다.
이제 서비스도 좀더 구현해 보고 화면 ui 부분과의 연계부분도 테스트 해보도록 합시다.
728x90
'개발일지' 카테고리의 다른 글
| 도커 설치 하고 도커에 오라클 11g 환경 설정하기 (0) | 2021.03.24 |
|---|---|
| STS4 / JPA / swagger2 / H2 db연동 테스트 샘플 프로젝트 따라하기 (0) | 2021.03.23 |
| 리액트 일정관리 예제 테스트 (0) | 2021.03.16 |
| mysql 접속 속도가 너무 느려서 해결책을 찾아봄... (0) | 2019.08.13 |
| React.js 프로젝트 데모 실습 (0) | 2019.08.13 |

